Zapier App
The transfer of contacts between Dialfire and an external system is possible via our App on Zapier. For this you need an account, which you can create here free of charge.
Our Dialfire Integration can be found here.
How to use the App
Transfer contacts from Dialfire to an external system
-
Create a new Zap in Zapier.
-
Search for the "Dialfire App" to be used in the Zap.
-
Select the Trigger Event "Contact enters Zapier Webhook" and click "Continue".
-
Click on "Sign in to Dialfire" to log in to Dialfire.
- Important: The logged in user must be on the "Administrator" team.
-
Select the campaign from which you want to export contacts.
- Only campaigns that are not hidden and have "scripting" enabled will be displayed.
-
Select an existing Webhook Task or create a new Task (Create a new Webhook Task).
- Note: If you select an existing Task, the Service-URL (if any) will be overwritten with the Zapier-URL.
-
Test your new connection by clicking on "Test & Review".
- If everything worked, you should now be shown a sample contact from your campaign.
- If there are no contacts in your campaign yet, select "Skip".
The setup of the Trigger Event is now complete. You can now select your target action to which the contact data from Dialfire will be forwarded in the future.
Transfer contacts from an external system to Dialfire
-
Configure the Trigger Event of the system from which the data is to be exported according to your requirements.
-
Select the "Dialfire App" as "Do this..."-Action
-
Select "Create or update contact" as the Action Event and then click "Continue".
-
Click on "Sign in to Dialfire" to log in to Dialfire.
- Important: The logged in user must be on the "Administrator" team
-
Select the campaign to which you want to import contacts.
- Only campaigns that are not hidden and have scripting enabled will be displayed.
-
Select the Call Task into which you want to import the contacts.
-
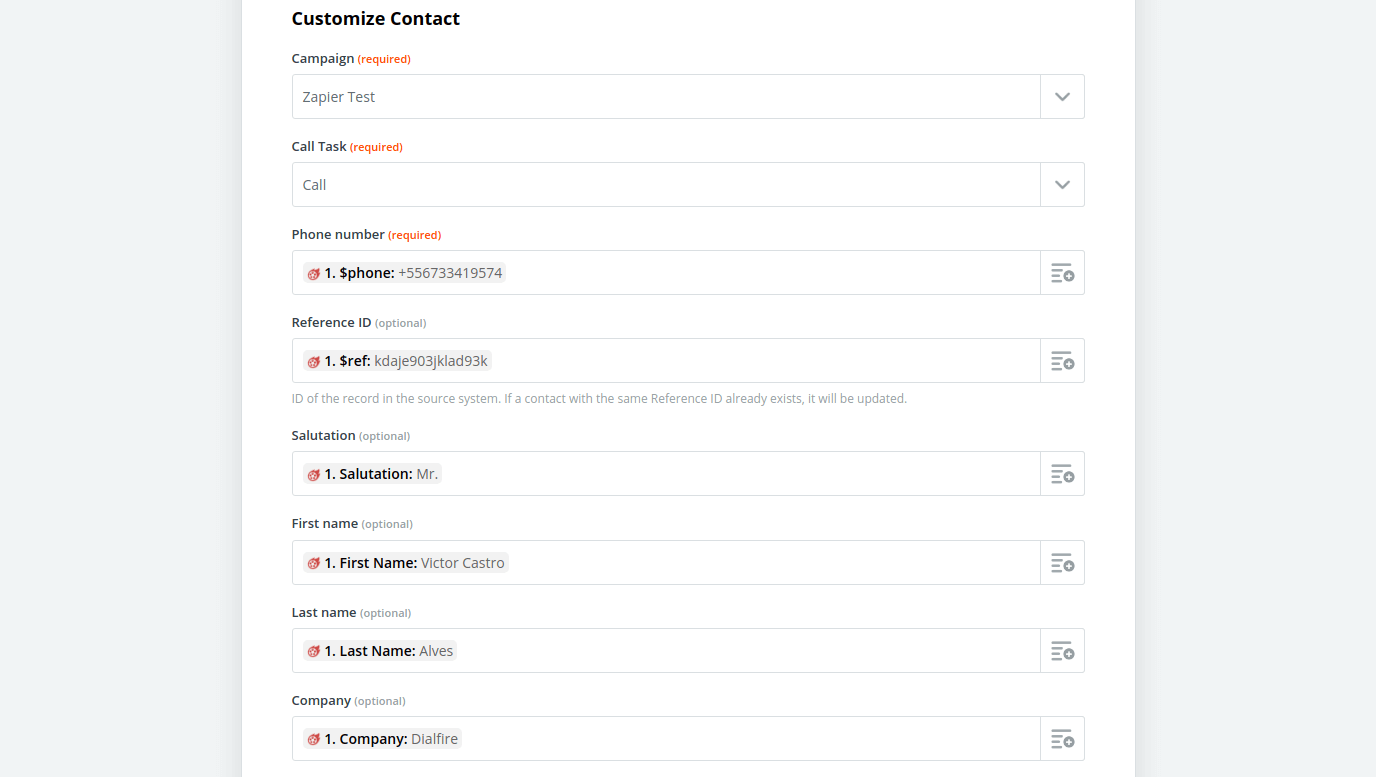
Define the desired mapping of contact fields between the source and target data record
- Only the fields you need in Dialfire have to be assigned.
-
In the last step you will get an overview of the fields to be imported.
- If you are satisfied with the result, click on "Test & Review" to send the sample data record to Dialfire.
The setup of the Action Event is completed. You should now see the example contact in your campaign in Dialfire.
If everything has worked, you can now activate your Zap or integrate further actions.
Example of field mapping
