Salesforce App
In order to share your data between Dialfire and Salesforce you need at least a Dialfire account and a Salesforce account.
Installation
-
Install the Dialfire App in your Salesforce account via this link
-
After installation of the package you need to login again to your Salesforce account and share access to your data. You will then be redirected to Dialfire where you also need to log in. It is important that your user has administrator rights in Dialfire.
-
After successful login, you will be redirected to the app configuration page.
Configuration
Data synchronization is based on campaigns in Salesforce and campaigns in Dialfire, i.e. all contacts and leads within the specified campaign are transferred to Dialfire for further processing. Changes to contact and lead data in Dialfire are transferred back to Salesforce. Calls and call recordings made in Dialfire show up in the activity list of the Salesforce contact or lead.
On the left side, select the desired campaign in Salesforce. On the right side, select a campaign template in Dialfire. You can also set the campaign title in Dialfire. Then click Create.
This creates the connection and also a new campaign in Dialfire. An additional entry appears on the configuration page where the connection can be further configured.
The configuration can be changed at any time. If you want to adjust the configuration at a later time, you just need to open the configuration page again.
To change the configuration of your connection, click Edit.
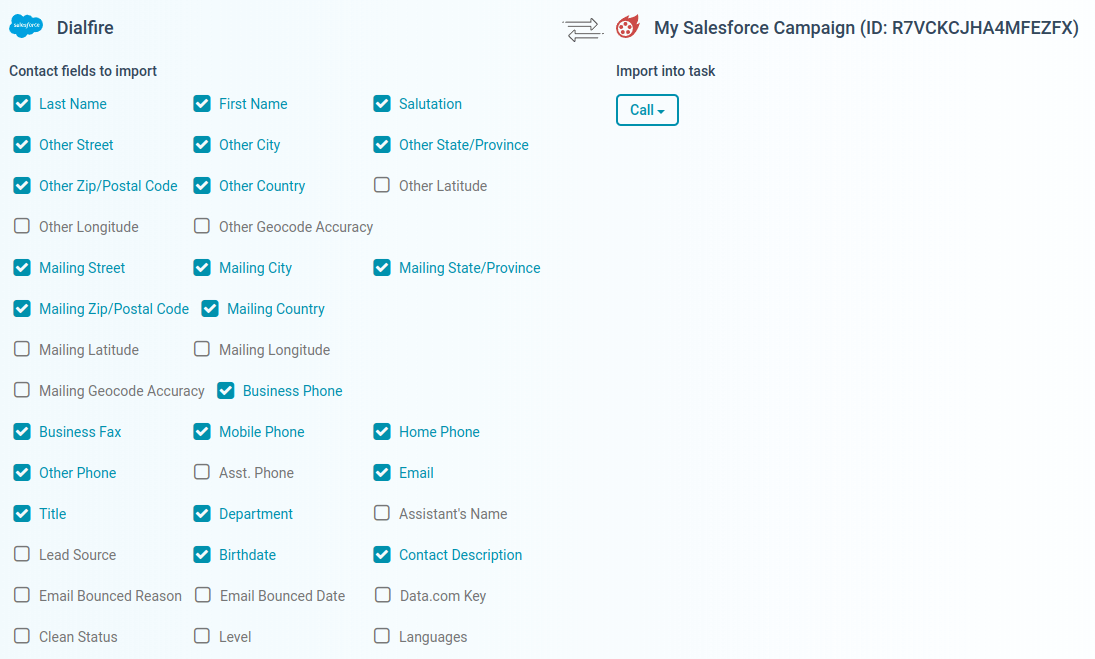
On the left side you can define which fields of your contacts and leads should be shared with Dialfire. By default, many fields are already selected. You can adjust this setting at any time. Changes to the fields you have activated here will also be transferred back from Dialfire to Salesforce.
On the right side you can select the Dialfire Task in which the data should be imported. In most cases you can keep the default setting.
As soon as you press Edit again, the changes will become active.
To transfer the contacts and leads from your Salesforce campaign to Dialfire, please press Synchronize. This will start the synchronization. From now on, synchronization will be automatic, i.e. new contacts and leads that are a member of the campaign will automatically be transferred to Dialfire. Deleted contacts and leads or those moved out of the campaign in Salesforce are also removed from Dialfire.
The connection can be deleted via Delete.
You can create as many connections as you want. For example, you could create a campaign in Salesforce for initial lead calls and a campaign for follow-up calls of converted contacts and call them in different campaigns in Dialfire. But you can also make multiple calls in Dialfire if you adjust the Taskflow accordingly.
Dialfire contact telephony
Log in to Dialfire to call the contacts and leads from your Salesforce campaign.
For each Salesforce campaign you link to Dialfire, a new campaign is created in your Dialfire account.
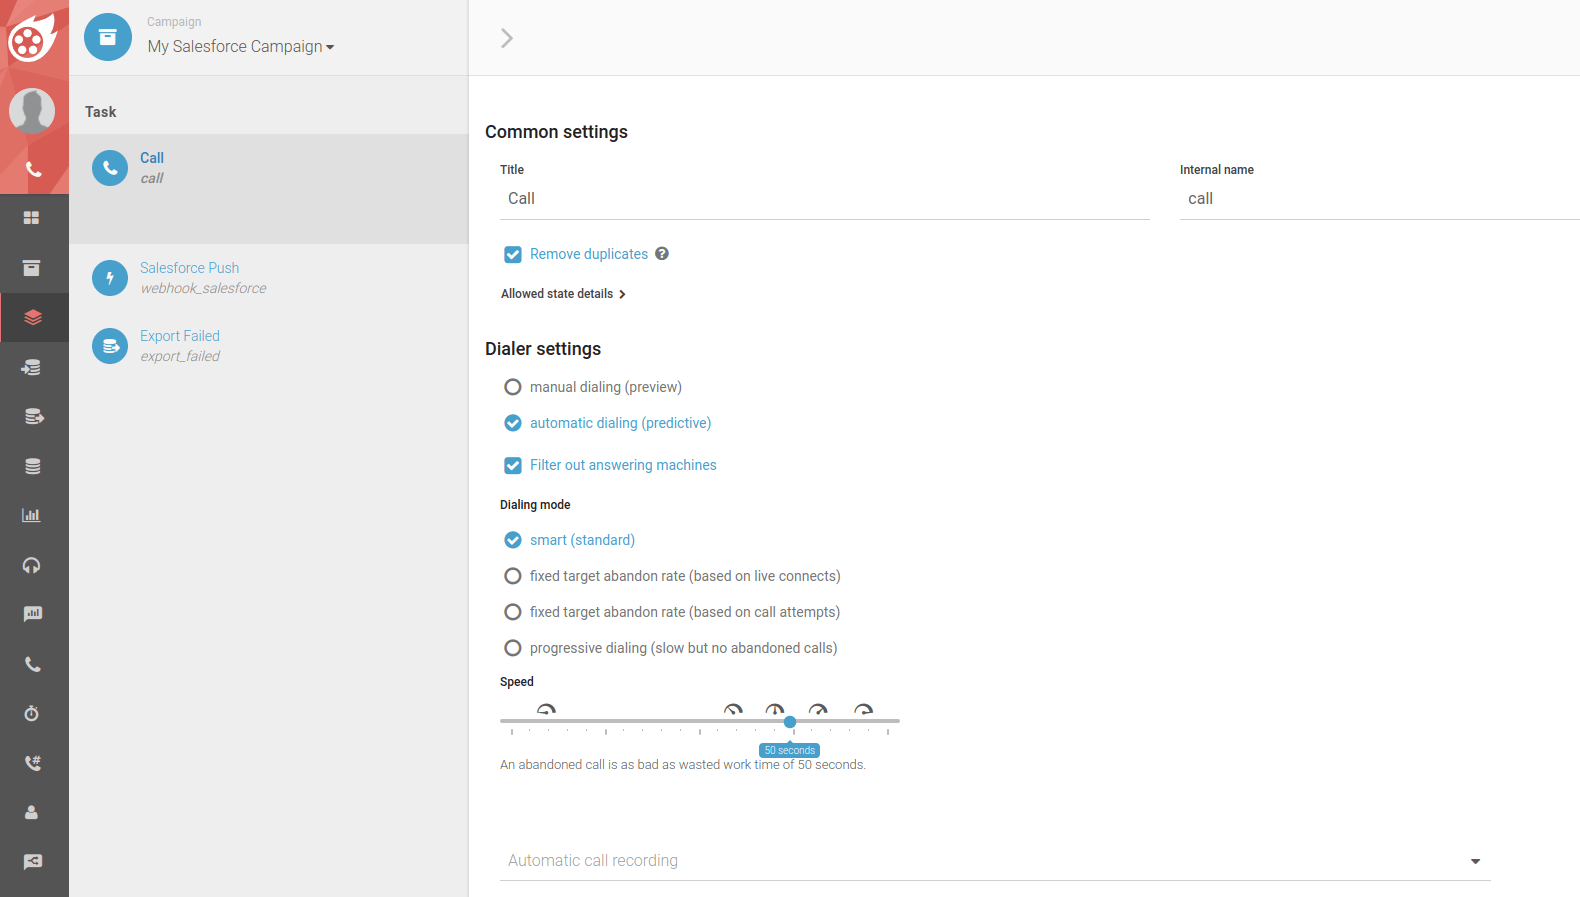
Depending on which campaign template you have chosen, different tasks and contact forms are automatically created in Dialfire. You can adjust this default configuration to your individual needs at any time.
If you have not used Dialfire yet, please have a look at our documentation or contact our support team.
Common to all campaign templates is the "Salesforce Push" webhook task. Through this task, contact changes and call results are transferred from Dialfire to Salesforce. By default, the Taskflow is already configured to transfer the changes to Salesforce following each call. However, you can always customize the Taskflow according to your own needs.
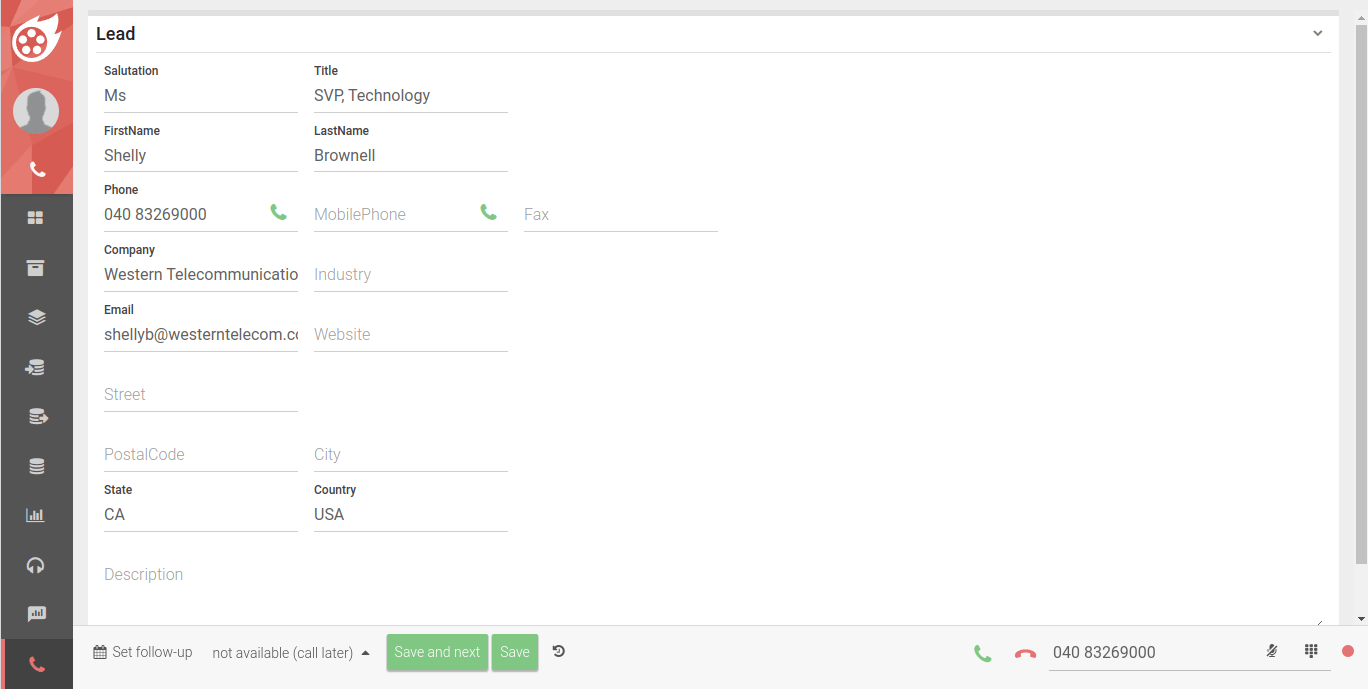
The same applies to the campaign contact form. It is also preconfigured and can be customized according to your requirements.