HubSpot
The HubSpot connector calls the contacts or leads of a HubSpot segment (list) in a Dialfire campaign. After each call it writes the result back to HubSpot: the call with its recording, changed fields, booked meetings and notes.
This page covers the HubSpot-specific steps. For the principles shared by all connectors (fields, synchronization times, error messages), see How connectors work.
Requirements
- A Dialfire account and a HubSpot account.
- A Dialfire user with administrator rights.
- A HubSpot user who can read and edit contacts and see segments. Linking leads also requires access to leads.
- Optional, for instant updates: Marketing Hub Professional or Enterprise, and the "Edit workflows" permission for the HubSpot user. Without these, the connector works exactly the same way, just on a schedule instead of instantly.
- Optional, for the Customer Journey Report: a Professional or Enterprise subscription (custom events). The Customer Journey Report itself requires Marketing Hub Enterprise.
Step 1: Prepare a segment in HubSpot
Create a segment (list) with the records you want to call. In HubSpot go to CRM → Segments → Create segment. Choose Contacts or Leads as the object.
- An active segment (filter-based) updates itself: new matching records reach Dialfire automatically, and records that no longer match drop out of the campaign.
- A static segment only changes when you add or remove records yourself.
Only segments of contacts and leads can be linked. Segments of companies, deals or tickets don't appear in the list.
Step 2: Connect your HubSpot account
- Open connect.dialfire.com/connectors/hubspot or install the Dialfire app from the HubSpot App Marketplace.
- Sign in to Dialfire with your administrator user.
- On HubSpot's consent screen, choose your HubSpot account and confirm the access.
Optional permissions on the consent screen: HubSpot shows some permissions as checkboxes that are not ticked by default.
- To link lead segments, tick the lead permissions.
- To use the Journey Report, tick "access to send Custom Events".
Without the ticks everything else works. You can grant them later with Grant permission on the connector page. Your bindings are kept.
Step 3: Link a segment to a campaign
- On the left, choose the HubSpot segment. The list shows the name, the type and the number of records of each segment.
- On the right, choose the Dialfire campaign type (basic or calendar) or -- clone existing Dialfire campaign --.
- Enter the campaign title and click .
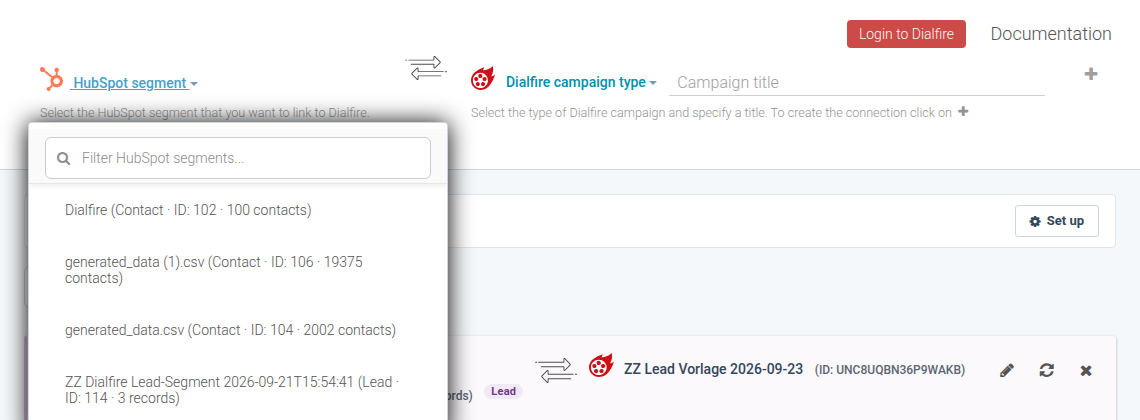
If lead segments are missing from the list, the connection doesn't have the lead permission yet. The page says so and offers Grant permission.
Step 4: Fields and phone number
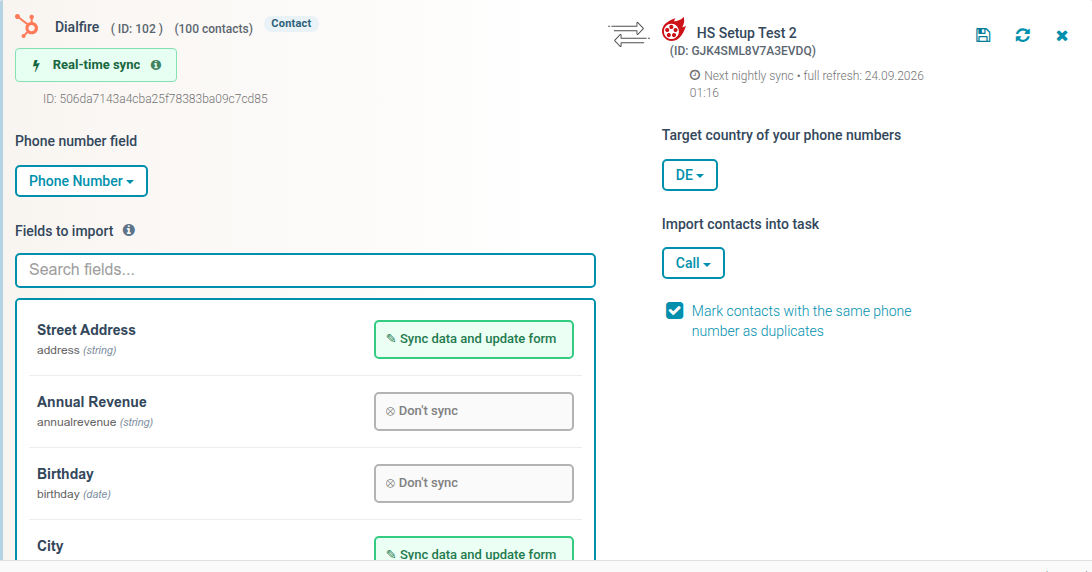
Open the binding with .
- Fields to import: the most common fields are preselected (name, phone numbers, e-mail, address, company, job title, lead status and others). Use the search box to find more, including your own properties. HubSpot fields that can't be changed (for example calculated values) are marked read-only and can only be imported.
- Phone number field (contacts): choose which HubSpot property is dialed, for example Phone Number or Mobile Phone Number.
- Where is the phone number? (leads): a lead has no phone number of its own. Choose the link to the associated contact and the phone field on that contact. Dialfire then also takes the contact's name and address. Until you have chosen this, the synchronization of a lead binding is paused.
- Mark contacts with the same phone number as duplicates: on by default for contacts and off for leads, because several leads can belong to the same person.
For a lead binding, choose where the phone number comes from:
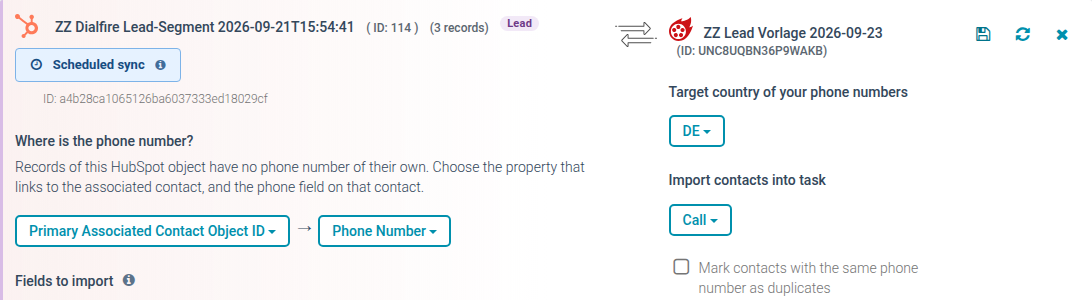
Leads without a linked contact, or whose contact has no phone number, are imported but can't be dialed. The binding shows a notice with the number of such records.
How the synchronization works
A badge on each binding shows the mode:
- Real-time sync: Dialfire has created a HubSpot workflow called "Send contacts of list '…' to Dialfire campaign '…'". Contacts that join the segment are in Dialfire within seconds. Leave this workflow unchanged.
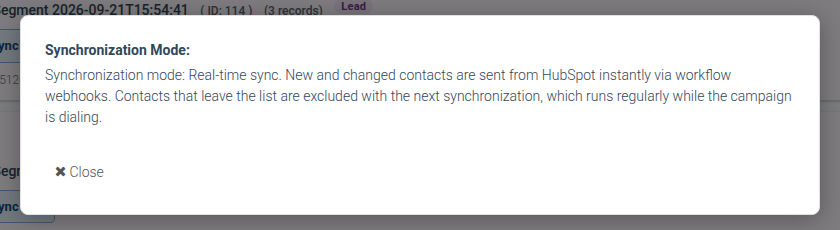
- Scheduled sync: there is no workflow. New records arrive with the regular synchronization (about every 10 minutes while the campaign is being called, or when you click Synchronize). Click the badge to see why. Usually the HubSpot subscription or the "Edit workflows" permission is missing. Lead segments always use scheduled sync, because HubSpot doesn't offer an instant trigger for them.


Clicking the badge explains the current mode:
In both modes:
- Changes to records already in Dialfire are applied at night (between 1 and 5 am) or when you click Synchronize.
- Records that leave the segment are taken out of the call queue. This happens once two synchronizations confirm it, or immediately after a manual synchronization.
- Contacts deleted in HubSpot are also taken out of the campaign.
Setting up the real-time workflow yourself
If Dialfire couldn't create the workflow, you can create it yourself. Click the Scheduled sync badge. The panel shows the webhook address with Copy URL. Then, in HubSpot:
- Automation → Workflows → Create workflow, choose Contact-based.
- Enrollment trigger: List membership, and choose your segment.
- Tab Re-enrollment: switch on Allow contacts to re-enroll and choose Contact is a member of list.
- Click +, then Data ops → Send a webhook.
- Method POST, paste the copied URL, authentication None (the URL contains the access key).
- Save and activate the workflow.
What Dialfire writes to HubSpot
After each call, when the contact passes the Hubspot Push task:
- Call: a call titled "Call in Dialfire" on the contact. It includes the direction, duration, phone numbers, the agent, the agent's comment and the result. The outcome is set to Connected, No answer or Wrong number. Recordings can be played directly in HubSpot. Each call is logged only once.
- Fields: changed values of the selected fields. A lead's stage can be changed this way too, if Pipeline stage is selected as a field.
- New records: a contact created in Dialfire is created in HubSpot as well and added to the segment. A new lead is linked to its contact.
- Meeting (calendar campaign): when the agent books an appointment, a meeting is created on the contact. The owner is the contact's owner, or else the HubSpot user who connected the account.
- Note: if the campaign fills the field
hs_contact_note, a note is added to the contact.
Optional: HubSpot Customer Journey Report
HubSpot's journey reports only count calls made with HubSpot's own calling tools. So Dialfire can also send each call as a custom event, which you can then use in journey reports.
- In the connector, open HubSpot Journey Report → Set up.
- In HubSpot go to Data Management → Event Management → Create an event → Create custom event, and use the internal name the connector shows you.
- Add the five properties listed in the connector (call outcome, status, direction, duration and campaign).
- Check the permission in the connector. If it says Grant permission, authorize again and tick "access to send Custom Events".
- Per binding, choose whether its calls are reported (Report this campaign's calls to the HubSpot Journey Report).
Setting up Dialfire for your calls
Each binding creates a new campaign in your Dialfire account. Log in to Dialfire and:
- Set the caller ID for your outgoing calls.
- Add your agents in the Users menu.
- Check the call and recording settings of the tasks.
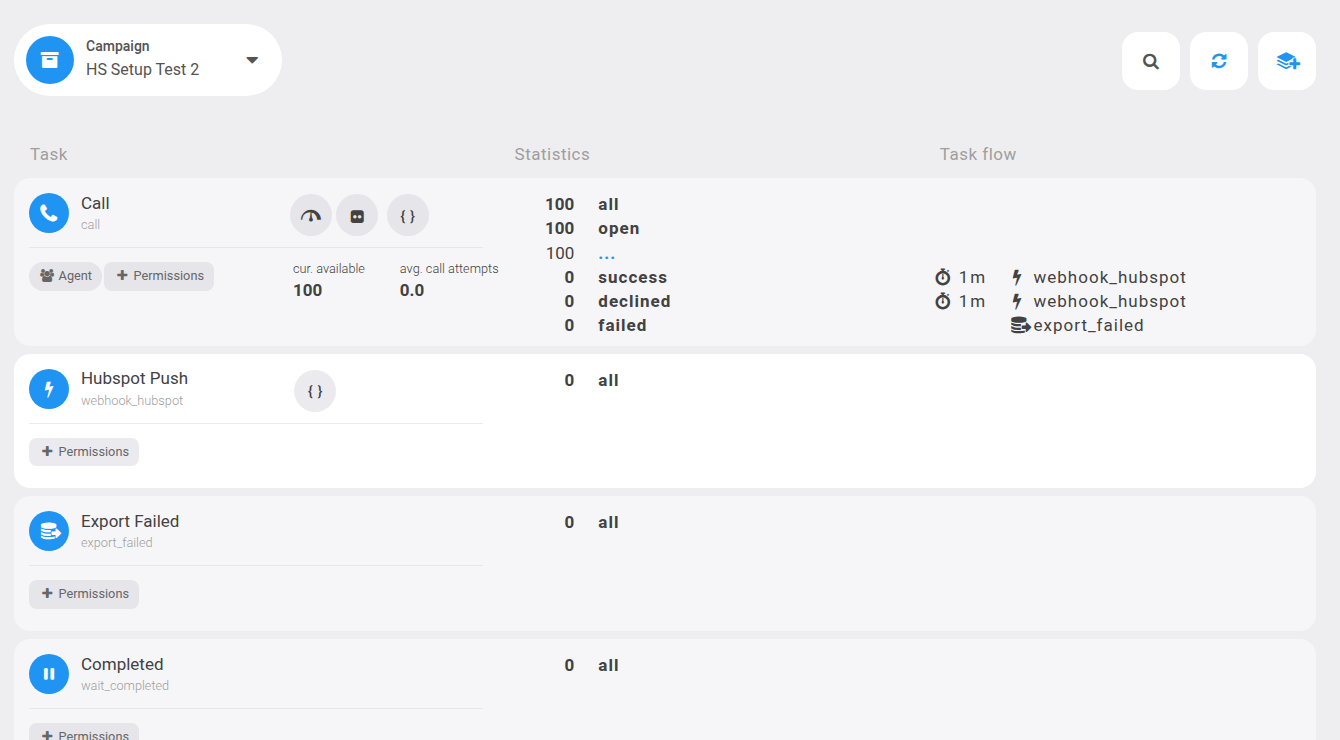
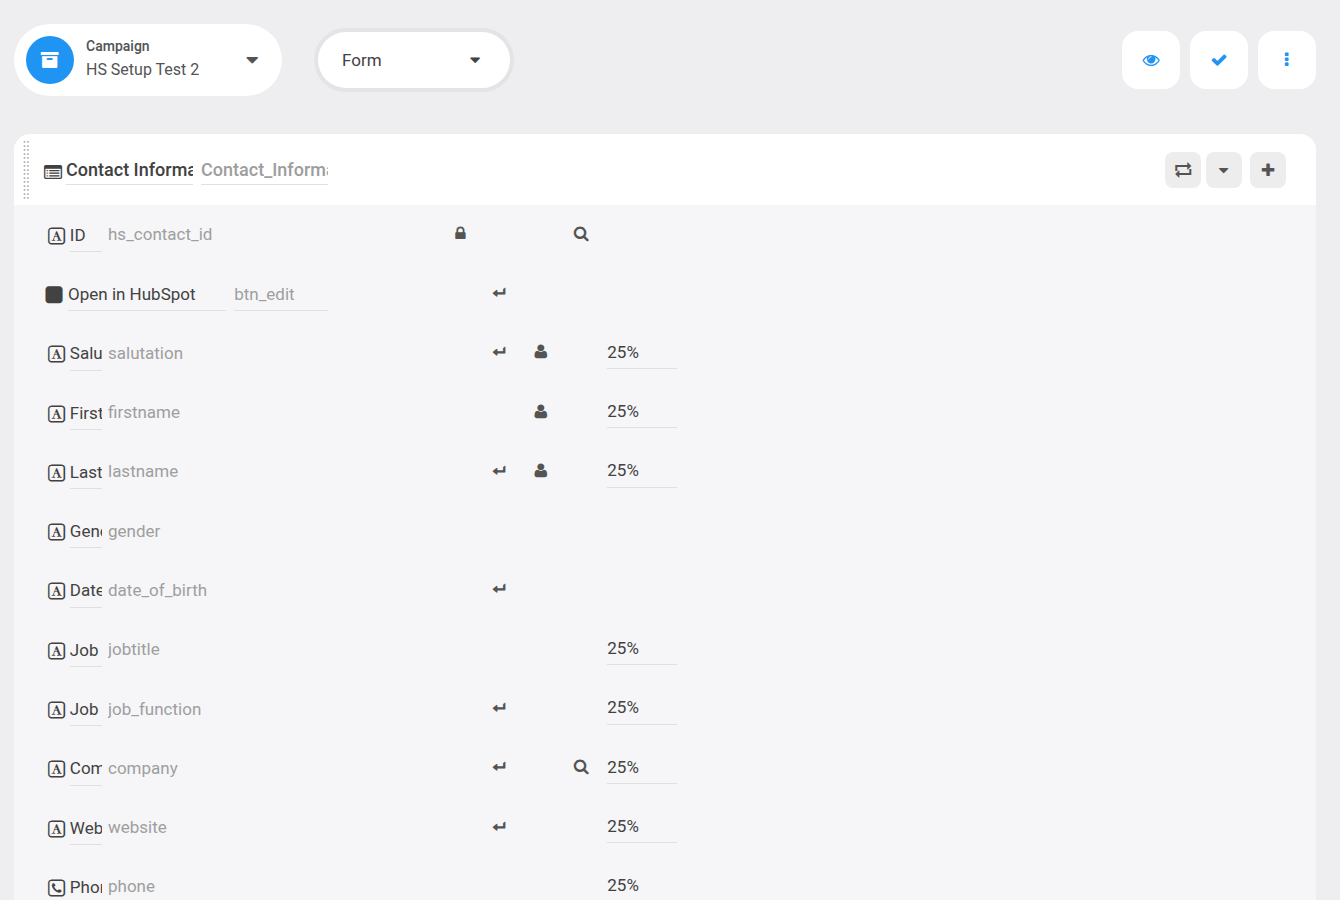
- Check the contact form (menu Campaign, Form view) and make sure the fields your agents need are visible.
The campaign template already contains the Hubspot Push task, which sends the results to the CRM after each call. You can adapt the task flow and the form to your needs at any time.
Need help?
New to Dialfire? Have a look at our documentation or contact our support team.
Troubleshooting
| Situation | Solution |
|---|---|
| "HubSpot has withdrawn access for this account" | The Dialfire app was uninstalled in HubSpot, or the user who connected it was removed. Click Connect HubSpot account again. Campaigns and settings stay as they are. |
| "The HubSpot authorization is not getting anywhere" | Check that the Dialfire app is still installed in HubSpot, then click Go to the HubSpot authorization. |
| Lead segments are missing | The lead permission is missing. Grant permission, then tick the lead checkboxes on HubSpot's screen. |
| "Synchronization is paused until you choose where the phone number comes from" | Lead binding: choose the contact link and the phone field (step 4). |
| "HubSpot rate limit reached" | HubSpot is limiting requests for a moment. Wait about 20 seconds, then click Retry. |
| Only "Scheduled sync" | Real-time needs Marketing Hub Professional/Enterprise and the "Edit workflows" permission. Alternatively, set up the workflow yourself (see above). |